
本教程展示了如何使用 react 和 Tailwind CSS 创建产品网站。我们将介绍如何使用创建 React 应用程序配置覆盖 (CRACO)使用 Tailwind CSS 设置 React ;TAIlwind 的 css 实用程序类和变体以及如何使用它们;如何轻松使网站暗模式兼容;什么是群体;以及如何启用变体。
先决条件
在开始之前,您需要安装Node.js和npm。如果您安装了 node.js,那么您将安装 npm。
node -v
您应该能够看到版本。对 npm 执行相同的操作:
npm -v
需要注意的是,Tailwind CSS需要Node.js 版本 12.13.0 或更高版本。
如果您遇到任何一个错误,那么您必须安装 Node.JS。您可以按照 Node网站上的安装说明进行操作,也可以按照我们的文章“使用 nvm 安装多个版本的 Node.js ”进行操作。
设置 React 和 Tailwind CSS
注意:如果您不熟悉 Create React App,请先查看“ Create React APP: get React PRojects Ready Fast ”。
首先,使用以下命令创建一个 React 项目create-react-app:
npx create-react-App react-shop
然后,将目录更改为创建的项目:
cd react-shop
接下来,我们将安装 Tailwind CSS 所需的依赖项:
npm install -D TailwindCSS@npm:@tailwindcss/PostCSS7-compat postcss@^7 autoprefixer@^9
我们正在安装具有 PostCSS 7 兼容性版本的 Tailwind CSS,因为在撰写本文时,Create React App(或 CRA)不支持 PostCSS 8。我们也在安装autoprefixer,因为它是2.0 版之后的Tailwind CSS 所必需的。
设置 CRACO
通常,要配置 CRA,您需要运行react-scripts eject或npm run eject使用 CRA 的默认脚本。但是,这非常不方便,因为它会将隐藏在 CRA 中的所有配置(如 webpack 配置、Babel 配置、PostCSS 配置等)弹出到您的项目中,编辑它可能会变得很麻烦或产生 CRA 无法解决的问题将无法再支持。
这就是Create React App Configuration override(或 CRACO)的用武之地。 CRACO 是一个向 CRA 添加简单配置层的库。与其将 CRA 中的所有配置都弹出到你的项目中——例如,只是向 Webpack 添加一些配置——所有新的配置或对原始配置的更改都将放在一个新文件中craco.config.js。CRACO 允许您配置 CRA,以便轻松地充分利用它。
我们在这里需要 CRACO 来覆盖 PostCSS 配置并添加tailwindcss插件。所以,让我们先安装它:
npm install @craco/craco
使用 CRA 时,脚本package.json如下所示:
"scripts": {
  "start": "react-scripts start",
  "bUIld": "react-scripts build",
  "test": "react-scripts test",
  "eject": "react-scripts eject"
}
由于我们使用 CRACO 来执行默认情况下无法使用 CRA 执行的操作,因此我们需要更改脚本以使用 CRACO 来构建项目或在开发中运行它:
"scripts": {
  "start": "craco start",
  "build": "craco build",
  "test": "craco test",
  "eject": "react-scripts eject"
},我们已经在,和脚本中替换react-scripts了。我们没有对脚本进行任何更改。cracostartbuildtesteject
接下来,craco.config.js在项目的根目录中创建 CRACO 配置文件:
module.Exports = {
  style: {
    postcss: {
      plugins: [
        require('tailwindcss'),
        require('autoprefixer'),
      ],
    },
  },

}
此配置文件将tailwindcss和autoprefixer插件添加到postcss.
现在我们将为 Tailwind CSS 生成配置文件:
npx tailwindcss init
注意:如果您使用的是 Node.js v14,则会报告有关运行此命令时抛出的错误的问题,该错误显示“找不到模块 'autoprefixer'”。
这将tailwind.config.js在项目的根目录中创建文件。它将包含以下内容:
module.exports = {
  purge: [],
  darkmode: false, // or 'media' or 'class'
  theme: {
    extend: {},
  },
  variants: {
    extend: {},
  },
  plugins: [],
}
以下是每个配置键的含义:
purge:这用于指定 Tailwind CSS 应该扫描的文件并查看正在使用哪些 Tailwind CSS 类,以便它可以删除生产中所有未使用的样式和类。darkMode:这指定了项目中暗模式的行为。该值可以是media- 意味着将根据暗模式媒体查询应用暗模式样式,这取决于用户操作系统的默认模式。它也可以是class,这意味着当 html 文档中的父元素具有dark类时,将应用暗模式样式。theme:这可用于修改主题的调色板、字体、断点等。我们将在本教程后面看到如何更改主题。variants:这允许您将其他变体应用于 Tailwind CSS 的核心插件。我们将在后面的教程中看到它是如何工作的。plugins:添加插件的部分,可以添加额外的实用程序类、自定义变体、基本样式或更多。
现在,我们只做两个更改。首先,我们将更改purge密钥:
purge: ["./src/**/*.{js,JSX,ts,tsx}", "./public/index.HTML"],这告诉顺风CSS翻阅所有js,jsx,ts和tsx中的文件src目录中,public/index.html文件找出哪些类将会从顺风CSS使用,并删除任何未使用的类。
第二个变化是暗模式:
darkMode: "media", // or false or 'class'
为了在本教程中简单起见,我们将仅根据用户的操作系统偏好保留暗模式。
使用 Tailwind CSS 设置我们的 React 项目的最后一步是将一些 Tailwind CSS 样式包含在src/index.css. 将此文件的内容替换为以下内容:
@tailwind base;@tailwind components;@tailwind utilities;
该@tailwind指令基本上将样式导入到index.css. 并且默认情况下,CRA进口src/index.css在src/index.js:
import './index.css';
这意味着 Tailwind CSS 样式将应用到我们的 React 项目中,我们准备开始构建一个漂亮的网站!
了解 Tailwind CSS 实用程序和变体
在开始编码之前,让我们了解一下 Tailwind CSS 实用程序类和变体是什么。Tailwind CSS 旨在让样式组件更容易,并帮助您专注于制作可重用的组件。实用程序类是范围广泛的类,它们允许您以您能想到的任何方式设置组件的样式,而无需编写任何 CSS。
例如,要为<div>元素设置边框样式、更改字体大小、更改背景和文本颜色,您需要使用 CSS 编写如下内容:
div {
  border: 1px solid #f00;
  font-size: 15px;
  background-color: #ff007f;
  color: #fff;}
使用 Tailwind CSS,您只需使用实用程序类即可:
<div class="border border-red-100 text-lg bg-red-400 text-white"></div>
以下是此示例中每个类的含义:
border: 设置边框宽度为 1pxborder-red-100: 将边框颜色设置为红色(基于主题)text-lg: 给出字体大小1.125rem和行高1.75rembg-red-400: 将背景颜色设置为红色(基于主题)text-white: 将文本颜色设置为白色
您还可以使用许多其他类,以及许多不同深浅的颜色,这使主题化更容易。使用实用程序类,您几乎不需要真正编写任何 CSS。
好的,但是媒体查询呢?伪类呢?黑暗模式呢?可以在不必自己编写任何 CSS 的情况下完成这些吗?
这就是变体出现的时候。变体允许您根据设备断点、元素状态或是否启用暗模式为元素添加样式。
因此,以前您可能已经这样做了,以根据设备的大小更改元素的宽度:
div {
  width: 50%;}
  @media screen and (max-width: 1024px) and (min-width: 768px) {
  div {
    width: 80%;
  }}
  @media screen and (max-width: 767px){
  div {
    width: 100%
  }
}
使用 Tailwind CSS,它可以简单地完成如下:
<div class="w-full md:w-3/4 lg:w-1/2"></div>
这个应用w-1/2类(这意味着width: 50%当)min-width: 1025px适用于当前屏幕的宽度,应用w-3/4类(这意味着width: 80%当)min-width: 768px适用于当前屏幕的宽度,并应用w-full类(这意味着width: 100%;)当其他变体不要再申请。
这无疑使您在每个项目中必须完成的繁琐工作变得更加轻松快捷。起初,它可能看起来令人困惑,但是当您开始更多地涉足它时,您会意识到使用实用程序类和变体是如何成为第二天性的。
您可以在项目的官方文档【https://tailwindcss.com/docs】中阅读有关配置 Tailwind 的更多信息。
实现我们的组件
回到我们的网站。我们正在创建一个简单的网站,它将以简洁的设计展示产品。为简单起见,我们将使用来自Fake store API【https://fakestoreapi.com/】 的假数据。我们将采用示例 JSON 响应,而不是实际执行对 API 的请求,并将其放置在我们项目的 JSON 文件中。同样,这只是为了本教程的简单性。
转到产品端点并复制响应。然后,创建文件src/data/products.json并将响应粘贴到其中。它应该是一个类似于这样的对象数组:
{
  "id": 1,
  "title": "Fjallraven - Foldsack No. 1 Backpack, Fits 15 Laptops",
  "price": 109.95,
  "description": "Your perfect pack for everyday use and walks in the forest. Stash your laptop (up to 15 inches) in the padded sleeve, your everyday",
  "category": "men's clothing",
  "image": "HTTPS://fakestoreapi.com/img/81fPKd-2AYL._AC_SL1500_.jpg"
}让我们从实现Product组件开始。此组件将是一个卡片组件,用于显示有关产品的信息。src/components/Product.js使用以下内容创建:
function Product ({product: {title, price, description, category, image}}) {
  return (
    <div>
      <div style={{backgroundImage: `url(${image})`}}></div>
      <div>
        <h1>{title.substr(0, 50)}</h1>
        <h3>{category}</h3>
        <p>{price}$</p>
        <div>{description.substr(0, 100)}</div>
      </div>
    </div>
  );
}
export default Product;
如您所见,该Product组件仅显示产品详细信息。我们目前还没有添加任何样式类。
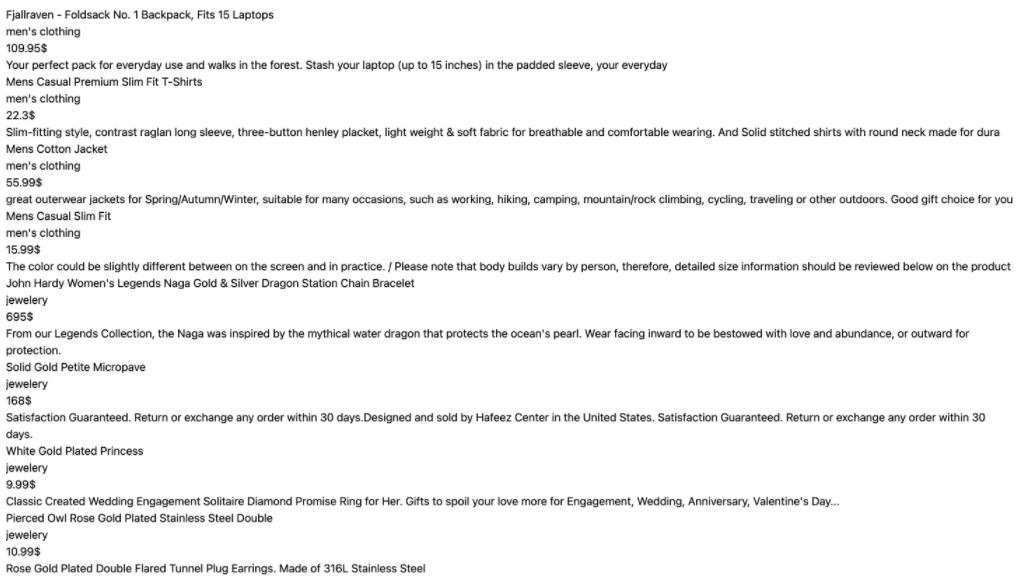
接下来,转到src/App.js并将内容更改为以下内容:
import "./App.css";import Product from "./components/Product";import products from "./data/products.json";function App() {
  return (
    <div>
      <div>
        {products.map((product) => (
          <Product product={product} key={product.id} />
        ))}
      </div>
    </div>
  );
}

export default App;在这里,我们将products.json文件导入为products. 然后,我们products使用Product我们之前创建的组件循环并显示每个产品。再次注意,我们没有添加任何样式类。
现在让我们启动服务器。运行以下命令:
npm start
你会看到只有一堆文本,但没有任何样式。
添加一些背景颜色
让我们开始添加一些样式。首先,我们将更改页面的背景颜色。为此,我们将利用 Tailwind 的背景颜色类。背景颜色类的格式为bg-{color}-{numericscale},其中numericScale是可选的。
默认情况下,颜色可为white,black,gray,red,blue,green,yellow,orange,indigo,purple和pink。数字标度定义了颜色的深浅,其中50最浅的深浅和900最深的深浅。例如,如果您希望背景颜色为浅红色,则可以使用bg-red-200.
在我们的网站中,我们将背景颜色设置为浅灰色,因此我们将类添加bg-gray-200到最外层的<div>元素中src/App.js:
return (
  <div className="bg-gray-200">
    <div>
      {products.map((product) => (
        <Product product={product} key={product.id} />
      ))}
    </div>
  </div>
);
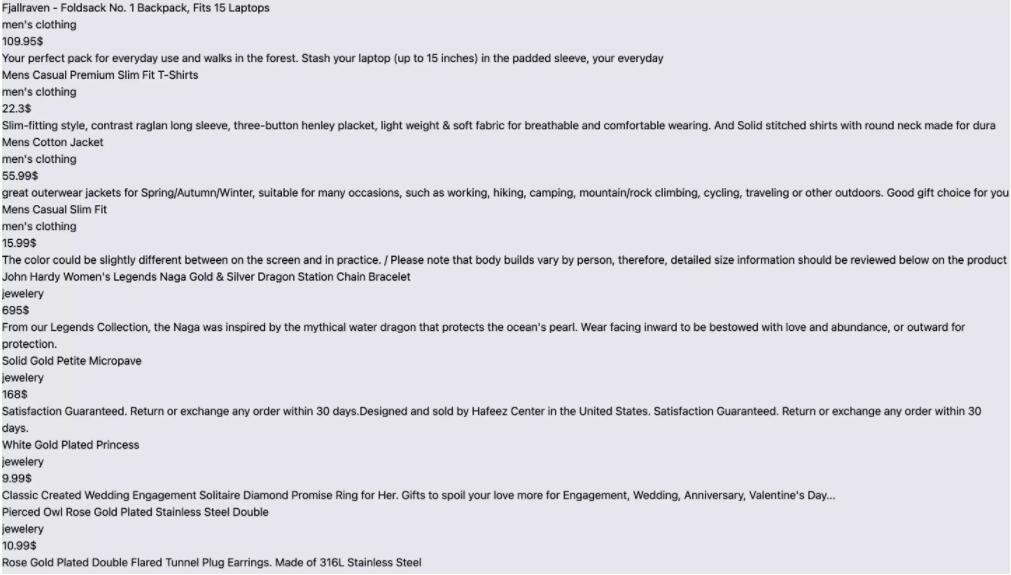
如果您现在检查网站(如果您的服务器没有继续运行,请确保再次运行它),您会看到背景已更改为浅灰色。
更改内容宽度
接下来我们要做的是在屏幕宽度至少为 时将内容的宽度更改为屏幕实际宽度的 50% 768px,但在小型设备上保持全宽。我们将利用 Tailwind 的宽度类,我们之前已经讨论过了。宽度类的格式为w-{size},其中size可以是 0 到 96 的范围,指的是 中的值rem;像1/2或的比率3/5,或其他指百分比的比率;或关键字,如auto自动宽度或full100% 宽度。
要指定根据屏幕尺寸的宽度,我们使用像变种sm,md,lg等这些变体指定的需要的以应用规则的最小屏幕尺寸。
在我们的例子中,由于我们希望宽度至少为 的屏幕的宽度是父级的 50% 768px,我们将使用md带有的变体w-1/2:
return (
  <div className="bg-gray-200">
    <div className="md:w-1/2">
      {products.map((product) => (
        <Product product={product} key={product.id} />
      ))}
    </div>
  </div>
);现在宽度将更改为屏幕宽度的一半。但是,将其水平居中会好得多。为此,我们将使用 Tailwind 的边距实用程序类。边距类采用格式m{side}-{value},其中side是可选的,并且可以特定于元素的每一侧,例如t顶部、b底部、l左侧和r右侧,或者使用特定的水平y或垂直使用x。value可以在 0 到 96 的范围内,可以仅px用于1px或auto。不仅如此,您还可以通过添加-到类的开头来添加负边距。例如,-m-2。
由于我们将元素水平居中,我们将使用mx-auto:
return (
  <div className="bg-gray-200">
    <div className="md:w-1/2 mx-auto">
      {products.map((product) => (
        <Product product={product} key={product.id} />
      ))}
    </div>
  </div>
);
你可以看到它是居中的。
设计产品组件
现在让我们继续讨论Product组件。我们还将为产品卡添加背景颜色。我们将其设置为白色,因此我们将使用bg-white. 我们还将使其全宽,因此我们将使用w-full. 为了将产品卡彼此分开,我们将使用mb-5以下方法为元素添加边距底部:
return (
  <div className="bg-white w-full mb-5">
    <div style={{backgroundImage: `url(${image})`}}></div>
    <div>
      <h1>{title.substr(0, 50)}</h1>
      <h3>{category}</h3>
      <p>{price}$</p>
      <div>{description.substr(0, 100)}</div>
    </div>
  </div>
);
你可以在网站上看到变化:
正如您在我们的Product组件中看到的那样,在最外面的元素中,我们有两个元素,一个包含产品的背景图像,另一个包含信息。我们希望将它们并排显示。我们需要做的第一件事是将最外层的显示更改<div>为 flex。为此,我们将使用 Tailwind 的显示类。与我们之前提到的类不同,显示类没有格式。它们只是我们想要的显示器的名称。因此,要将元素的 display 属性更改为flex,只需添加flex类:
return (
  <div className="flex bg-white w-full mb-5">
    <div style={{backgroundImage: `url(${image})`}}></div>
    <div>
      <h1>{title.substr(0, 50)}</h1>
      <h3>{category}</h3>
      <p>{price}$</p>
      <div>{description.substr(0, 100)}</div>
    </div>
  </div>
);接下来,我们将<div>像以前一样使用宽度类更改元素的宽度:
return (
  <div className="flex bg-white w-full mb-5">
    <div style={{backgroundImage: `url(${image})`}} className="w-5/12"></div>
    <div className="w-7/12">
      <h1>{title.substr(0, 50)}</h1>
      <h3>{category}</h3>
      <p>{price}$</p>
      <div>{description.substr(0, 100)}</div>
    </div>
  </div>

);
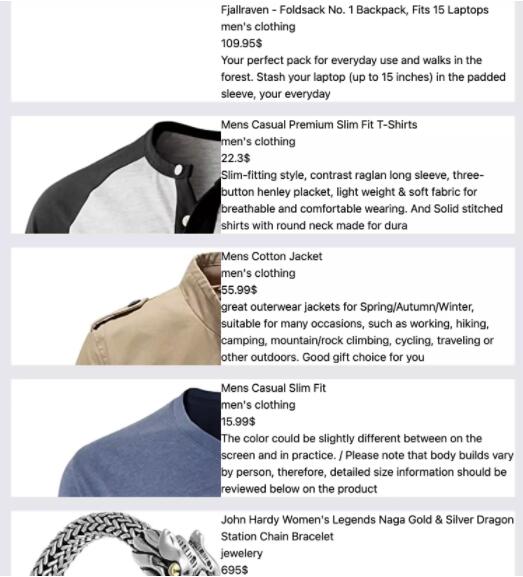
如果您现在检查网站,您会看到图像和文本现在彼此相邻。
添加一些间距
还有很多需要解决。首先,让我们为产品信息容器添加一些填充。为此,我们将使用 Tailwind 的填充类。填充类与我们之前检查的边距类完全相似,除了我们使用p代替m。
因此,我们将添加p-5到产品信息容器中。我们还将使用mt-4以下方法为描述容器添加一些边距:
return (
  <div className="flex bg-white w-full mb-5">
    <div style={{backgroundImage: `url(${image})`}} className="w-5/12"></div>
    <div className="w-7/12 p-5">
      <h1>{title.substr(0, 50)}</h1>
      <h3>{category}</h3>
      <p>{price}$</p>
      <div className="mt-4">{description.substr(0, 100)}</div>
    </div>
  </div>
);我们还将为整个容器添加顶部和底部边距,src/App.js以便第一个和最后一个产品从两侧都不会正好位于页面边缘。为此,我们将添加类py-4:
return (
  <div className="bg-gray-200 py-4">
    <div className="md:w-1/2 mx-auto">
      {products.map((product) => (
        <Product product={product} key={product.id} />
      ))}
    </div>
  </div>
);
我们将看到该网站现在开始变得更好。
改进组件的排版
现在让我们稍微处理一下排版。您可以看到产品信息看起来都一样。我们无法从描述等中区分标题与类别。首先,让我们更改一些文本的颜色。为此,我们将使用 Tailwind 的文本颜色类。这些类的格式类似于背景颜色类,但替换b为text. 例如,要使文本的颜色为绿色,请添加类text-green-100.
因此,让我们将类别的文本颜色更改text-gray-400为使其与其他文本相比略微褪色,让我们将价格文本颜色更改text-red-500为使其突出。我们还将为价格增加一个最高利润,以确保它最突出:
return (
  <div className="flex bg-white w-full mb-5">
    <div style={{backgroundImage: `url(${image})`}} className="w-5/12"></div>
    <div className="w-7/12 p-5">
      <h1>{title.substr(0, 50)}</h1>
      <h3 className="text-gray-400">{category}</h3>
      <p className="text-red-400 mt-4">{price}$</p>
      <div className="mt-4">{description.substr(0, 100)}</div>
    </div>
  </div>
);
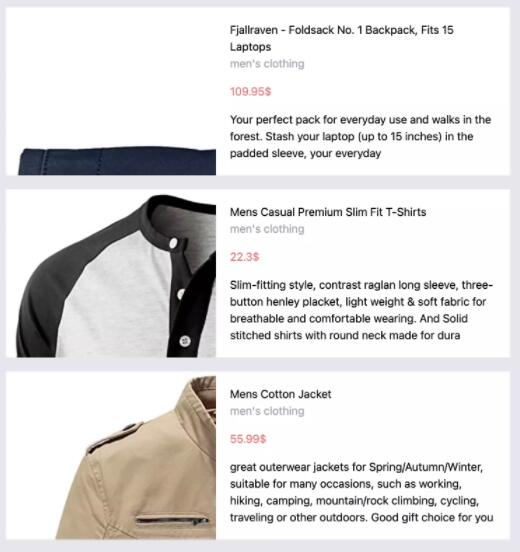
如果您现在访问该网站,您会看到文本在区分不同部分方面看起来更清晰一些:
接下来,让我们更改字体大小。为此,我们将使用 Tailwind 的字体大小类。这些类的格式是text-{size},其中size范围从sm到9xl。
我们将通过text-4xl为至少768px使用md变体的具有宽度的text-xl屏幕和较小的屏幕添加类来使价格的字体大小更大,我们将通过text-2xl为具有宽度的屏幕添加类来使标题更大至少768px也是:
return (
  <div className="flex bg-white w-full mb-5">
    <div style={{backgroundImage: `url(${image})`}} className="w-5/12"></div>
    <div className="w-7/12 p-5">
      <h1 className="md:text-2xl">{title.substr(0, 50)}</h1>
      <h3 className="text-gray-400">{category}</h3>
      <p className="text-red-400 mt-4 text-xl md:text-4xl">{price}$</p>
      <div className="mt-4">{description.substr(0, 100)}</div>
    </div>
  </div>);
文字现在看起来好多了。
定位产品图片
接下来,让我们修复图像以使其完全显示并正确定位背景图像。
首先,我们将更改背景图像大小。为此,我们将使用 Tailwind 的背景尺寸类。这些类的格式是bg-{size}, wheresize可以是auto,contain或cover。在我们的例子中,将bg-contain确保看到整个图像。
其次,我们将更改背景重复的属性以确保图像不会重复多次。为此,我们将使用 Tailwind 的背景重复类。这些类的格式是bg-{repeatValue},其中repeatValue是您赋予background-repeat属性的bg-repeat-round值,或舍入值和bg-repeat-space空间值。在我们的例子中,我们将使用bg-no-repeat.
第三,我们将更改背景位置属性,使图像始终居中。为此,我们将使用 Tailwind 的背景位置类。这些类的格式是bg-{position},position您要赋予background-position属性的值在哪里。我们将添加类bg-center:
return (
  <div className="flex bg-white w-full mb-5">
    <div style={{backgroundImage: `url(${image})`}} className="w-5/12 bg-contain bg-no-repeat bg-center"></div>
    <div className="w-7/12 p-5">
      <h1 className="md:text-2xl">{title.substr(0, 50)}</h1>
      <h3 className="text-gray-400">{category}</h3>
      <p className="text-red-400 mt-4 text-xl md:text-4xl">{price}$</p>
      <div className="mt-4">{description.substr(0, 100)}</div>
    </div>
  </div>);
现在,我们可以完整地看到图像。
您会注意到一些图像触及容器的边缘。为了解决这个问题,我们将向<div>背景图像元素添加一个包装元素并为其添加一些填充:
return (
  <div className="flex bg-white w-full mb-5">
    <div className="w-5/12 p-2">
      <div style={{backgroundImage: `url(${image})`}} className="bg-contain bg-no-repeat bg-center w-full h-full"></div>
    </div>
    <div className="w-7/12 p-5">
      <h1 className="md:text-2xl">{title.substr(0, 50)}</h1>
      <h3 className="text-gray-400">{category}</h3>
      <p className="text-red-400 mt-4 text-xl md:text-4xl">{price}$</p>
      <div className="mt-4">{description.substr(0, 100)}</div>
    </div>
</div>);请注意,我们已经将之前赋予背景图像的宽度移动到包装元素,并且我们已经将w-full和添加h-full到背景图像元素以确保它采用100%其父元素的宽度和高度。
添加框阴影和圆角
我们的产品现在看起来好多了。我们将为当前样式添加两个最后的润色。首先,我们将为每个产品添加一些阴影。我们将使用 Tailwind 的box shadow类。这些类的格式是shadow-{size}, wheresize是可选的,范围从sm到2xl。也可以none是去除任何框阴影或inner将阴影置于内部。其次,我们将使产品卡的边框有点圆。我们将使用 Tailwind 的边界半径类。这些类的格式rounded-{position}-{size},其中size是可选的,可以从范围sm到3xl或可none为0边界半径或full使其充分圆润。position也是可选的,可以是特定位置,如t顶部或l左侧,也可以特定于某个边缘,如tl左上角。
我们将添加shadow-sm到产品卡中,为其添加一个小阴影,rounded-lg并使边框变圆:
return (
  <div className="flex bg-white w-full mb-5 shadow-sm rounded-lg">
    <div className="w-5/12 p-2">
      <div style={{backgroundImage: `url(${image})`}} className="bg-contain bg-no-repeat bg-center w-full h-full"></div>
    </div>
    <div className="w-7/12 p-5">
      <h1 className="md:text-2xl">{title.substr(0, 50)}</h1>
      <h3 className="text-gray-400">{category}</h3>
      <p className="text-red-400 mt-4 text-xl md:text-4xl">{price}$</p>
      <div className="mt-4">{description.substr(0, 100)}</div>
    </div>
  </div>);
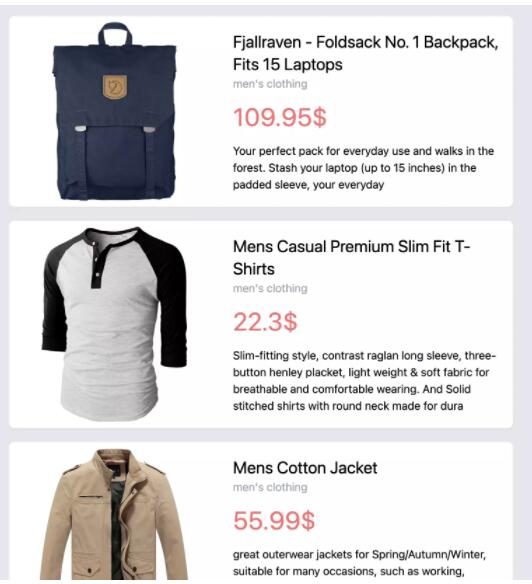
最后,我们的产品列表页面看起来像下面的截图。
自定义主题
到目前为止,我们所做的所有样式都基于 Tailwind 的默认样式。但是,Tailwind 还允许我们自定义主题。我们可以更改颜色、字体系列等。所有这些更改都是在tailwind.config.js.
让我们试着稍微改变一下颜色。有多种方法可以更改主题的颜色。
一种方法是定义您自己的颜色。例如,要为我们的主题添加新颜色,我们可以在 中执行以下操作tailwind.config.js:
module.exports = {
  purge: ["./src/**/*.{js,jsx,ts,tsx}", "./public/index.html"],
  darkMode: "media", // or 'media' or 'class'
  theme: {
    extend: {
      colors: {
        turquoise: "#40e0d0"
      }
    },
  },
  variants: {
    extend: {},
  },
  plugins: [],};
请注意,在 inside 中theme.extend,我们添加了一个colors对象,然后在其中添加了turquoise带有绿松石色十六进制代码的键。现在我们可以像使用默认颜色一样使用该颜色。例如,要将背景颜色设置为绿松石色,您可以使用bg-turquoise.
另一种自定义主题颜色的方法是更改默认颜色。正如前面提到的,在顺风默认的颜色white,black,gray,red,blue,green,yellow,orange,indigo,purple和pink。您可以更改这些颜色的实际值。
例如,要将 更改yellow为更多的芥末黄,请执行以下操作:
module.exports = {
  purge: ["./src/**/*.{js,jsx,ts,tsx}", "./public/index.html"],
  darkMode: "media", // or 'media' or 'class'
  theme: {
    extend: {
      colors: {
        yellow: "#e1ad01"
      }
    },
  },
  variants: {
    extend: {},
  },
  plugins: [],};
现在,当您使用黄色的默认类时,您将获得您在此处定义的黄色。您还可以使用数字刻度为不同的颜色深浅指定值:
module.exports = {
  purge: ["./src/**/*.{js,jsx,ts,tsx}", "./public/index.html"],
  darkMode: "media", // or 'media' or 'class'
  theme: {
    extend: {
      colors: {
        yellow: {
          200: "#feca1d",
          400: "#e1ad01",
          700: "#b48a01"
        }
      }
    },
  },
  variants: {
    extend: {},
  },
plugins: [],};您还可以使用lightest, light, DEFAULT, dark, 之类的键darkest:
module.exports = {
  purge: ["./src/**/*.{js,jsx,ts,tsx}", "./public/index.html"],
  darkMode: "media", // or 'media' or 'class'
  theme: {
    extend: {
      colors: {
        yellow: {
          light: "#feca1d",
          DEFAULT: "#e1ad01",
          dark: "#b48a01"
        }
      }
    },
  },
  variants: {
    extend: {},
  },
  plugins: [],};
添加调色板
更改颜色的第三种方法是使用Tailwind CSS 中的其他调色板,这就是我们将要做的。
首先,需要colors从tailwindcss/colors开始tailwind.config.js:
const colors = require("tailwindcss/colors")
接下来,我们将红色更改为玫瑰调色板,将灰色更改为蓝灰色:
const colors = require("tailwindcss/colors")module.exports = {
  purge: ["./src/**/*.{js,jsx,ts,tsx}", "./public/index.html"],
  darkMode: "media", // or 'media' or 'class'
  theme: {
    extend: {
      colors: {
        gray: colors.blueGray,
        red: colors.rose
      }
    },
  },
  variants: {
    extend: {},
  },
  plugins: [],};
如果您现在查看网站,您会发现我们使用的颜色略有变化。
如果你想很好地看到颜色的差异,你可以尝试将灰色改为琥珀色:
const colors = require("tailwindcss/colors")module.exports = {
  purge: ["./src/**/*.{js,jsx,ts,tsx}", "./public/index.html"],
  darkMode: "media", // or 'media' or 'class'
  theme: {
    extend: {
      colors: {
        gray: colors.amber,
        red: colors.rose
      }
    },
  },
  variants: {
    extend: {},
  },
  plugins: [],};
你会看到背景现在是黄色的。
您还可以更改字体系列等等,所有这些都来自tailwind.config.js,同时仍然使用 Tailwind CSS 提供的相同类。这样,您可以轻松自定义主题以适合您的设计。
添加深色模式
该dark变体允许我们轻松地为暗模式设置元素样式,同时为亮模式设置样式。
一开始,当我们建立我们的网站,我们改变了dark重点tailwind.config.js来media。这意味着当浏览器或操作系统设置为暗模式时将应用暗模式。
如果您想测试网站在暗模式下的外观,但没有将其设置为暗模式,则可以在 Chrome DevTools 中进行模拟。按打开 DevTools F12,然后按CTRL+ SHIFT+ P(或macOS 上的CMD+ SHIFT+ P)并在出现的下拉列表中输入“显示渲染”并选择显示的选项。最后,向下滚动到“模拟 CSS 媒体功能首选颜色方案”并选择prefers-color-scheme: dark。通过选择 ,可以执行相同的操作来测试灯光模式prefers-color-scheme: light。
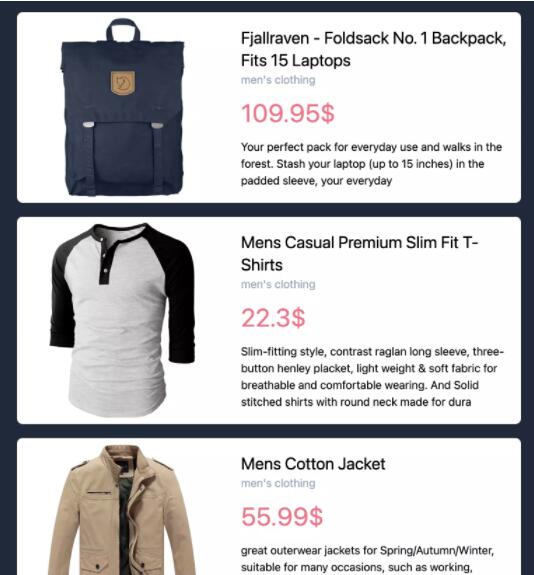
让我们首先通过添加类dark:bg-gray-800在黑暗模式下更改网站的背景颜色src/App.js:
return (
  <div className="bg-gray-200 py-4 dark:bg-gray-800">
    <div className="md:w-1/2 mx-auto">
      {products.map((product) => (
        <Product product={product} key={product.id} />
      ))}
    </div>
  </div>);
如果您现在检查并且您的浏览器/操作系统设置为暗模式(或模拟),您将看到背景颜色已更改为更深的灰色阴影。
现在让我们对产品卡进行更改。我们将类添加dark:bg-gray-300到最外层元素:
return (
  <div className="flex bg-white w-full mb-5 shadow-sm rounded-lg dark:bg-gray-300">
    <div className="w-5/12 p-2">
      <div style={{backgroundImage: `url(${image})`}} className="bg-contain bg-no-repeat bg-center w-full h-full"></div>
    </div>
    <div className="w-7/12 p-5">
      <h1 className="md:text-2xl">{title.substr(0, 50)}</h1>
      <h3 className="text-gray-400">{category}</h3>
      <p className="text-red-400 mt-4 text-xl md:text-4xl">{price}$</p>
      <div className="mt-4">{description.substr(0, 100)}</div>
    </div>
  </div>);
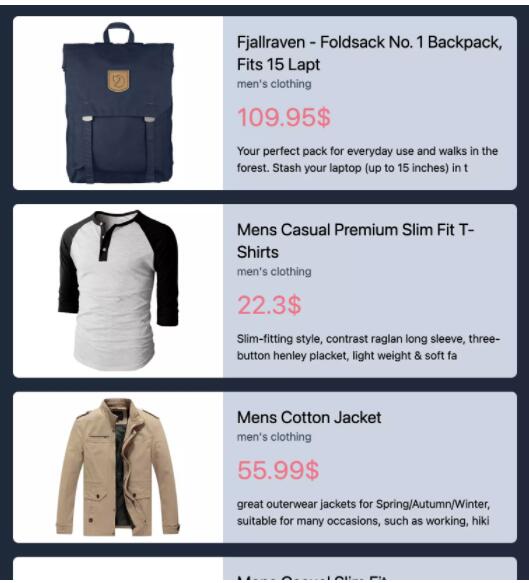
如果您现在检查,您会注意到产品卡的背景颜色已更改,但您还会注意到图像现在看起来不太好,因为它具有白色背景。
让我们在黑暗模式下为背景包装器添加一个白色背景,让它变得更好。这可以通过添加类来完成dark:bg-white。此外,类别文本颜色现在几乎不可见,因此我们将通过添加类将其更改为更暗的颜色dark:text-gray-700:
return (
  <div className="flex bg-white w-full mb-5 shadow-sm rounded-lg dark:bg-gray-300">
    <div className="w-5/12 p-2 dark:bg-white rounded-tl-lg rounded-bl-lg">
      <div style={{backgroundImage: `url(${image})`}} className="bg-contain bg-no-repeat bg-center w-full h-full"></div>
    </div>
    <div className="w-7/12 p-5">
      <h1 className="md:text-2xl">{title.substr(0, 50)}</h1>
      <h3 className="text-gray-400 dark:text-gray-700">{category}</h3>
      <p className="text-red-400 mt-4 text-xl md:text-4xl">{price}$</p>
      <div className="mt-4">{description.substr(0, 100)}</div>
    </div>
  </div>);
我们网站的最终外观如下所示。
为插件分组和启用变体
默认情况下,并非所有插件都启用了某些变体,因为这会导致文件过大。因此,如果我们需要使用这些变体,我们必须为tailwind.config.js我们想要的插件手动启用它们。这里的插件是我们一直在使用的类。例如,背景颜色属于backgroundColor插件。
未启用的变体之一是group-hover。组是一组组合在一起的元素,因此任何状态(例如悬停)都可以影响整个组。通过将group类添加到容器来声明组。然后,您可以将该group-hover变体与作为容器子元素的元素中的一个实用程序类一起使用。group-hover除非悬停组中的任何元素(即容器元素内的任何元素),否则不会应用您使用的实用程序类。
我们将制作每张产品卡片 a group,然后在悬停时我们将放大图像。因此,我们将group类Product添加到组件中的最外层元素,然后将以下类添加到具有背景图像的元素:
transition-transform:Tailwind 的过渡类之一。它仅将transition属性应用于transFORM更改。duration-300:Tailwind 的过渡持续时间类之一。它应用 atransition-duration值300ms。group-hover:transform:如上所述,group-hovervariant 确保transForm仅在组中的元素悬停时才应用该类。transform是 Tailwind 的转换类之一。它允许添加其他与转换相关的类。group-hover:scale-125:scale-125该类是 Tailwind 的规模类之一。它将scaleX 和 Y 的 设置为1.25,但您需要先添加transform类。
使用上述类,一旦产品中的任何元素悬停,图像就会放大。我们还将将该类添加overflow-hidden到Product组件的最外层元素,以确保如果图像超出其容器,则不会溢出。我们还将使用hover:shadow-2xl使产品卡的阴影更大transition-shadow duration-300,以确保过渡是无缝的:
return (
  <div className="flex bg-white w-full mb-5 shadow-sm rounded-lg dark:bg-gray-300 group overflow-hidden hover:shadow-2xl transition-shadow duration-300">
    <div className="w-5/12 p-2 dark:bg-white rounded-tl-lg rounded-bl-lg">
      <div style={{backgroundImage: `url(${image})`}} className="bg-contain bg-no-repeat bg-center w-full h-full transition-transform duration-300 group-hover:transform group-hover:scale-125"></div>
    </div>
    <div className="w-7/12 p-5">
      <h1 className="md:text-2xl">{title.substr(0, 50)}</h1>
      <h3 className="text-gray-400 dark:text-gray-700">{category}</h3>
      <p className="text-red-400 mt-4 text-xl md:text-4xl">{price}$</p>
      <div className="mt-4">{description.substr(0, 100)}</div>
    </div>
</div>);注意:如果您正在模拟暗模式(或使用暗模式),您可能会在亮模式下看到更好的效果,因此请务必切换到亮模式。
如果您现在尝试将鼠标悬停在产品上,您会看到阴影放大并且图像放大。
结论
我们使用 React 创建了一个简洁的响应式网站,而无需编写任何 CSS!这就是 Tailwind CSS 的魅力所在。Tailwind CSS 消除了乏味、重复的工作或编写 CSS。它还有助于创建主题,并允许您专注于创建具有时尚设计的可重用组件,这非常适合 React。我们在本文中介绍的内容只是触及了您可以使用 Tailwind CSS 轻松创建的所有美丽事物的表面。




网友评论文明上网理性发言 已有0人参与
发表评论: